Installing RAPAT® for Excel 365
To install RAPAT® for Excel 365, you will first need to visit Microsoft Appsource, which is Microsoft's online store containing "business applications and services built by industry-leading software providers". By simply searching for "RAPAT" or using the link: RAPAT® for Excel 365 you should be directed to the store add-in page as shown below.

Clicking "Get it now" will push the add-in directly to your version of Excel. If you are not signed into the account you typically use to access your Microsoft products (e.g. Excel, Outlook, Word, etc.), you will be prompted to sign in first. Note that if your account has two-factor authentication enabled, you may be asked to sign-in using that too.

Once completed, you should see the following page in the browser window

Clicking the "Open in Excel" link will open your desktop version of Excel, if available, or you may otherwise open Excel directly and open a new workbook - this does not impact the installation of the add-in
Once Excel is open, the add-in may take a moment to load, but once completed, a message stating "Add-ins loaded successfully" should be shown in the status bar at the bottom of the screen.

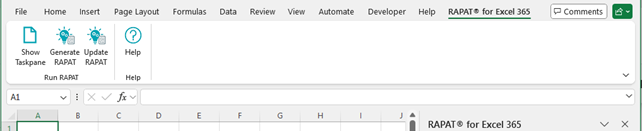
Once successfully loaded, RAPAT® for Excel 365 should be appear in the ribbon as shown below. If this is not the case and you can't find the add-in, please refer to the 'Troubleshooting' section at the bottom of this document.

If you see the following screen when Excel first opens, please simply close the workbook and open a new one. The RAPAT® for Excel 365 ribbon tab should still appear and you may now continue.

Activating RAPAT® for Excel 365
To activate RAPAT® for Excel 365 within the workbook and enable worksheet generation and the built-in functionality, you will need to click "Show Taskpane" within the RAPAT® for Excel 365 ribbon. Other buttons in the ribbon will not yet be active.

This will open a Welcome taskpane, where a registered user can input their email address to access and enable the functionality within RAPAT® for Excel 365.
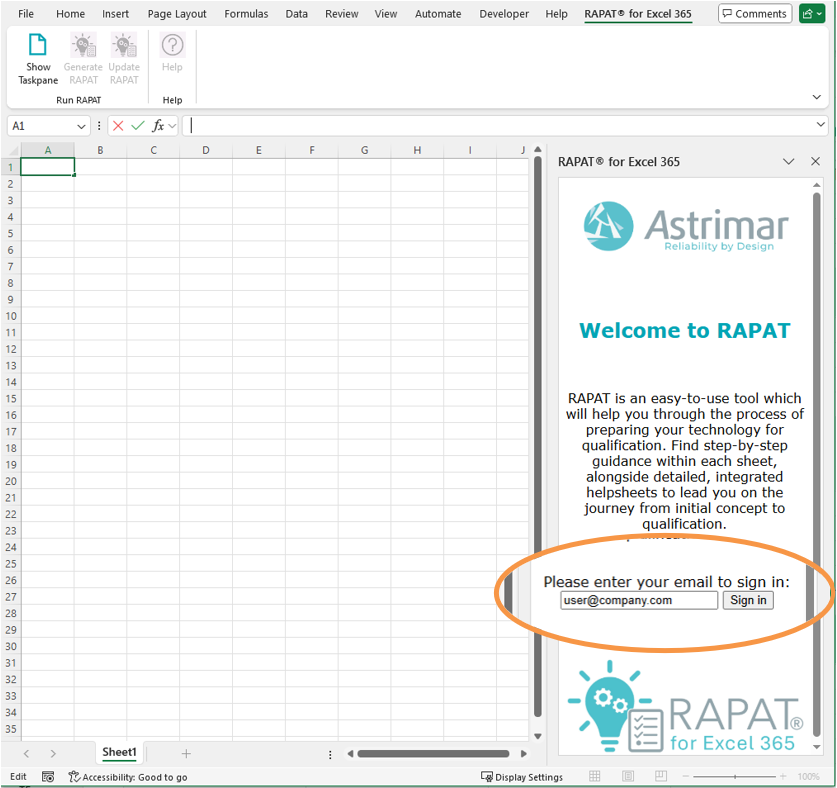
If successful, the taskpane will update with a welcome message and further instructions. The remaining buttons on the RAPAT ribbon will become available for use.

The taskpane window may now be closed.
Generating the RAPAT® for Excel 365 Worksheets
Using the Excel for 365 ribbon, click the 'Generate RAPAT' button to create all of the RAPAT worksheets within the workbook. This may take a minute, during which the workbook may appear to flicker and jump around; this is normal. Please do not try to use or navigate to any sheets during this process. During the generation period, the status bar at the bottom of the worksheet will display a message stating that the add-in is working on your "Generate RAPAT".

Once this message has disappeared, you may continue to use the workbook.
For the next steps and how to use RAPAT® for Excel 365, please refer to the Getting Started helpsheet.
Troubleshooting
Can't find the add-in within Excel
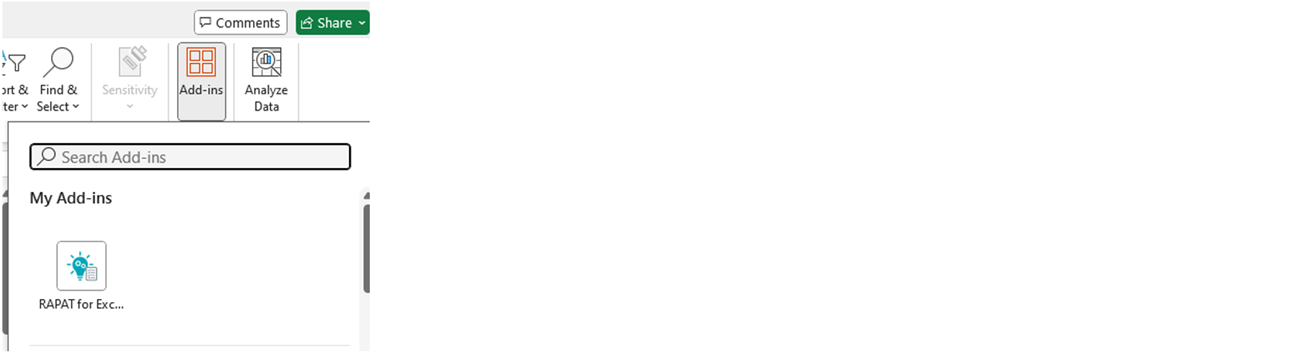
If you can't see the RAPAT® for Excel 365 add-in on your Excel ribbon, you can try the following steps. On the Home ribbon tab, look for the RAPAT® for Excel 365 add-in under "My Add-ins" after clicking the Add-in button.
If you still don't see it, make sure you are signed into Office. You can do this by following these 5 steps:
- Open any Office application and click Sign In in the top right corner
- Enter the email address and password you use with Office
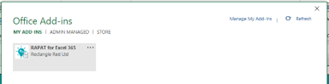
- Open the Add-ins dialog again and click on More Add-ins
- Under My Add-ins box, find the RAPAT® for Excel 365 add-in. If you don't see it, verify that you're signed into Office. Press Refresh to update the list
- Double-click the add-in to start it
Registering an Account to use with RAPAT® for Excel 365
Access to RAPAT® for Excel 365 is currently provided by invitation only via a registration form which you should have already received. **Coming soon** You may use this form to request a paid-for licence or a 7-day free trial. Only basic information will be requested for the free trial. If a paid-for license if requested, please provide enough information for Astrimar to generate and issue a PO for the requested license(s).**Coming Soon**
You will receive an email from software@astrimar.com once your account has been created and the provided email address registered.